UPDATE 27 September 2023 - THIS POST IS OUTDATED. I have written a new post about the way I tackle digital signage in 2023. Screenly (now called Anthias) does not work for me using Google Slides on 4K TVs, so I have changed to a new method. It is documented in this post.
If you have ever wanted to have a TV display in a lobby or reception area displaying your latest news etc this is the guide for you. The commercial options out there get expensive quickly and that is something that schools in particular can’t work with.
TLDR; Get a Pi, install Screenly OSE, set a Google Slides presentation as the only asset and you got yourself an easily updatable digital signage display for next to nothing. If your school or business use G-Suite, even better!
After trying briefly to write my own custom one for our school I ended up coming across Screenly and their Open Source Edition. They do offer a Pro version too, but for what we needed the OSE one was just fine.
When used in combination with Google Slides, it allows us to have an easily updatable display that can be managed by any members of staff with a Google or G-Suite account (that means you too C2K schools!). Simples!
What you will need for this:
Raspberry Pi (would recommend the starter kit Pi 3)
Large TV / Monitor with HDMI
Google account (personal or G-Suite will work)
First thing to do is download Screenly OSE. You can install it onto a Pi running Raspbian but it is much easier just to use the pre-made image. You can grab the latest image file from their Github repo here
Once that is downloaded you need to flash the image onto your SD card. I have found the easiest tool for this to be Etcher. Open the image file in Etcher and then pick your SD Card and hit Flash. This process can take up to ten minutes depending on the speed of your SD card. Once it is finished pop the SD Card into your Raspberry Pi and power it up.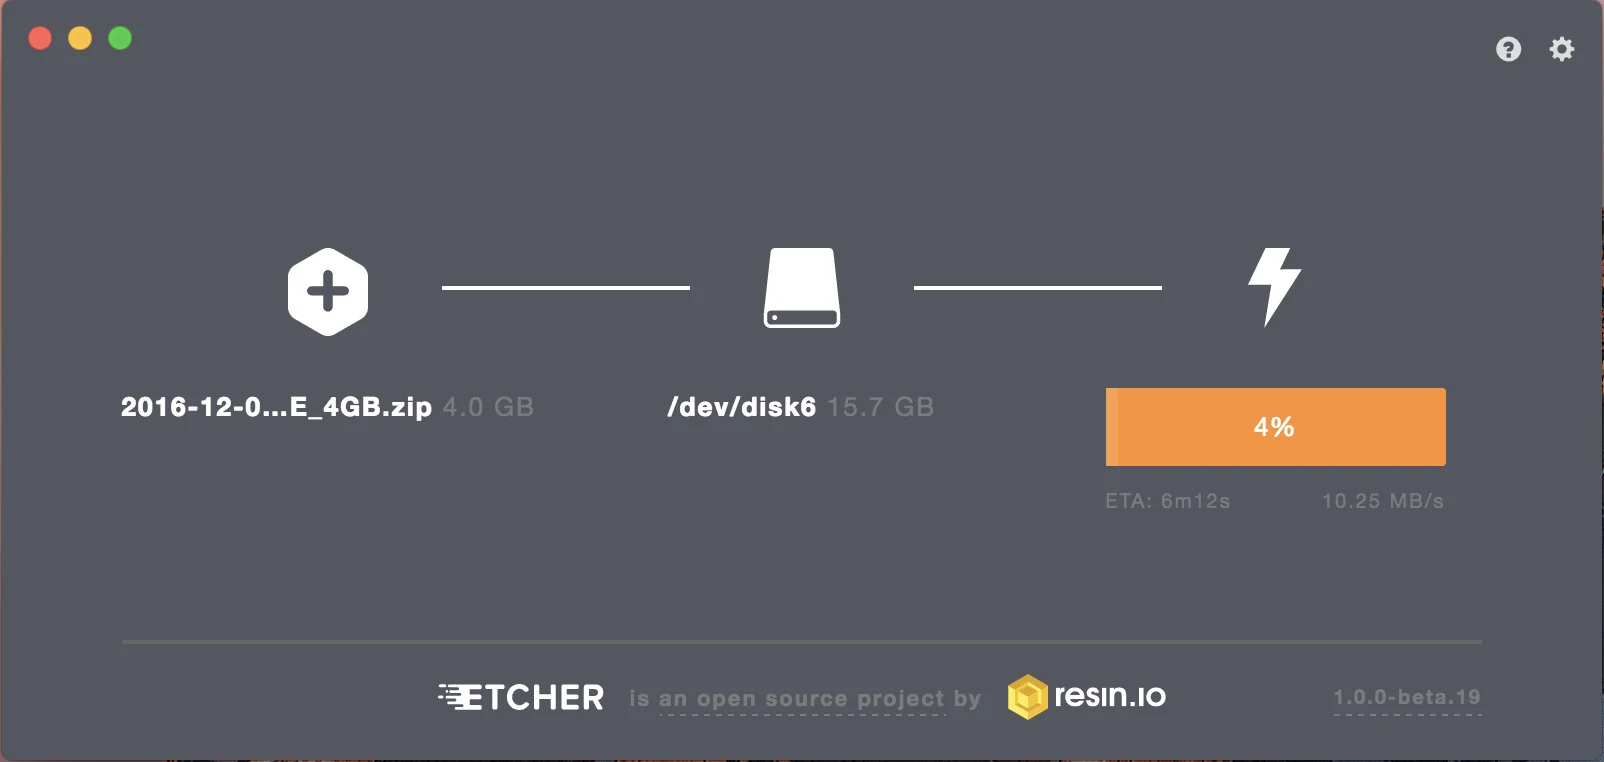
When it first boots you will see the IP address displayed for managing the device. Visit this address on your web browser on your computer / mobile device to access the management screen. Remember to add :8080 to the end of the address!
FAIR WARNING: be aware that this admin panel has no password protection so anyone who finds the address can mess with it. Make sure it is on a different VLAN to protect it or you can search Google for various ways to put a password on it yourself. Password protection is on the release schedule for the next update which hopefully will be out soon.
 You can add “assets” to Screenly from this admin panel. Upload images, movie files etc and set times and dates for when they are active and how long they should be displayed before going to the next asset.
We are not going to use it this way however. We will only add a single asset which will be a URL to our Google Slides presentation. Let’s make the presentation first.
Go to Google Slides and make yourself a quick presentation with some of the images and information you want to show on your fancy pants new digital sign. Don’t worry about slide timings, they will be set to a fixed time at the end.
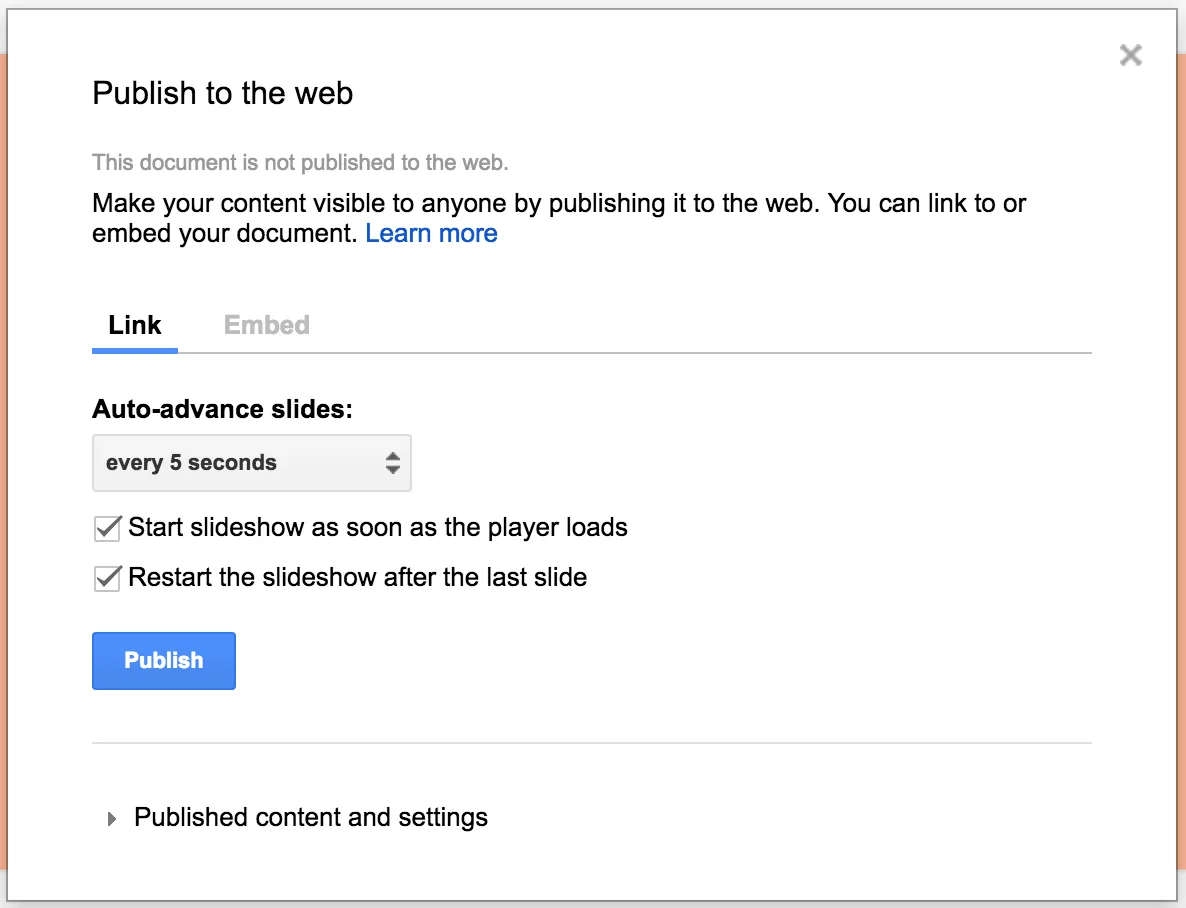 Once the presentation is ready go to File and Publish to Web… Choose Link and set auto advance slides to whatever value you wish (we use 5 seconds). Also make sure to tick both boxes underneath. Once you hit Publish you will be given a URL. Copy and paste this URL into another browser window and visit it to check it is working. Your slide show should start automatically and loop on completion.
Now go back to the Screenly admin panel at http://your-ip:8080 and click Add Asset. Give it a nickname, and paste in the URL into the Asset URL box. Asset type should be webpage. Set the start date to today and an end date in the future. As this is the only slide I would set this to years in the future.
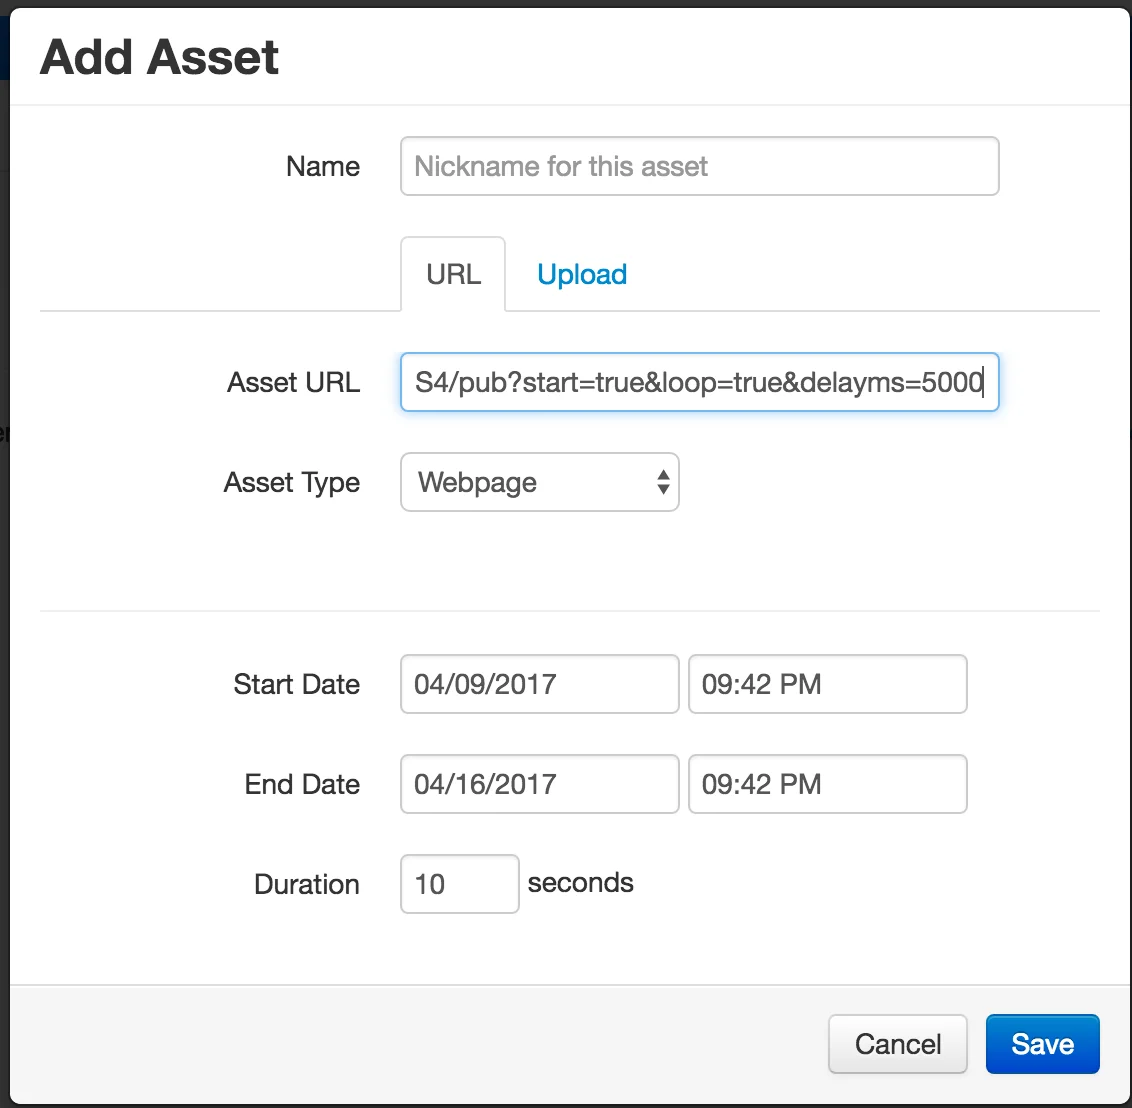 For duration I chose to use about twice the length of the presentation. So if you have 20 slides at 5 seconds each then set it to 200 seconds. You can set this as high as you like. What it does is reload the presentation every x seconds. This means if you update the slides on Google Slides, it will not show on the display until this Duration has passed. Unless you need lightning fast updates to the screen something like 30 minutes (or 1800 seconds) would be fine.
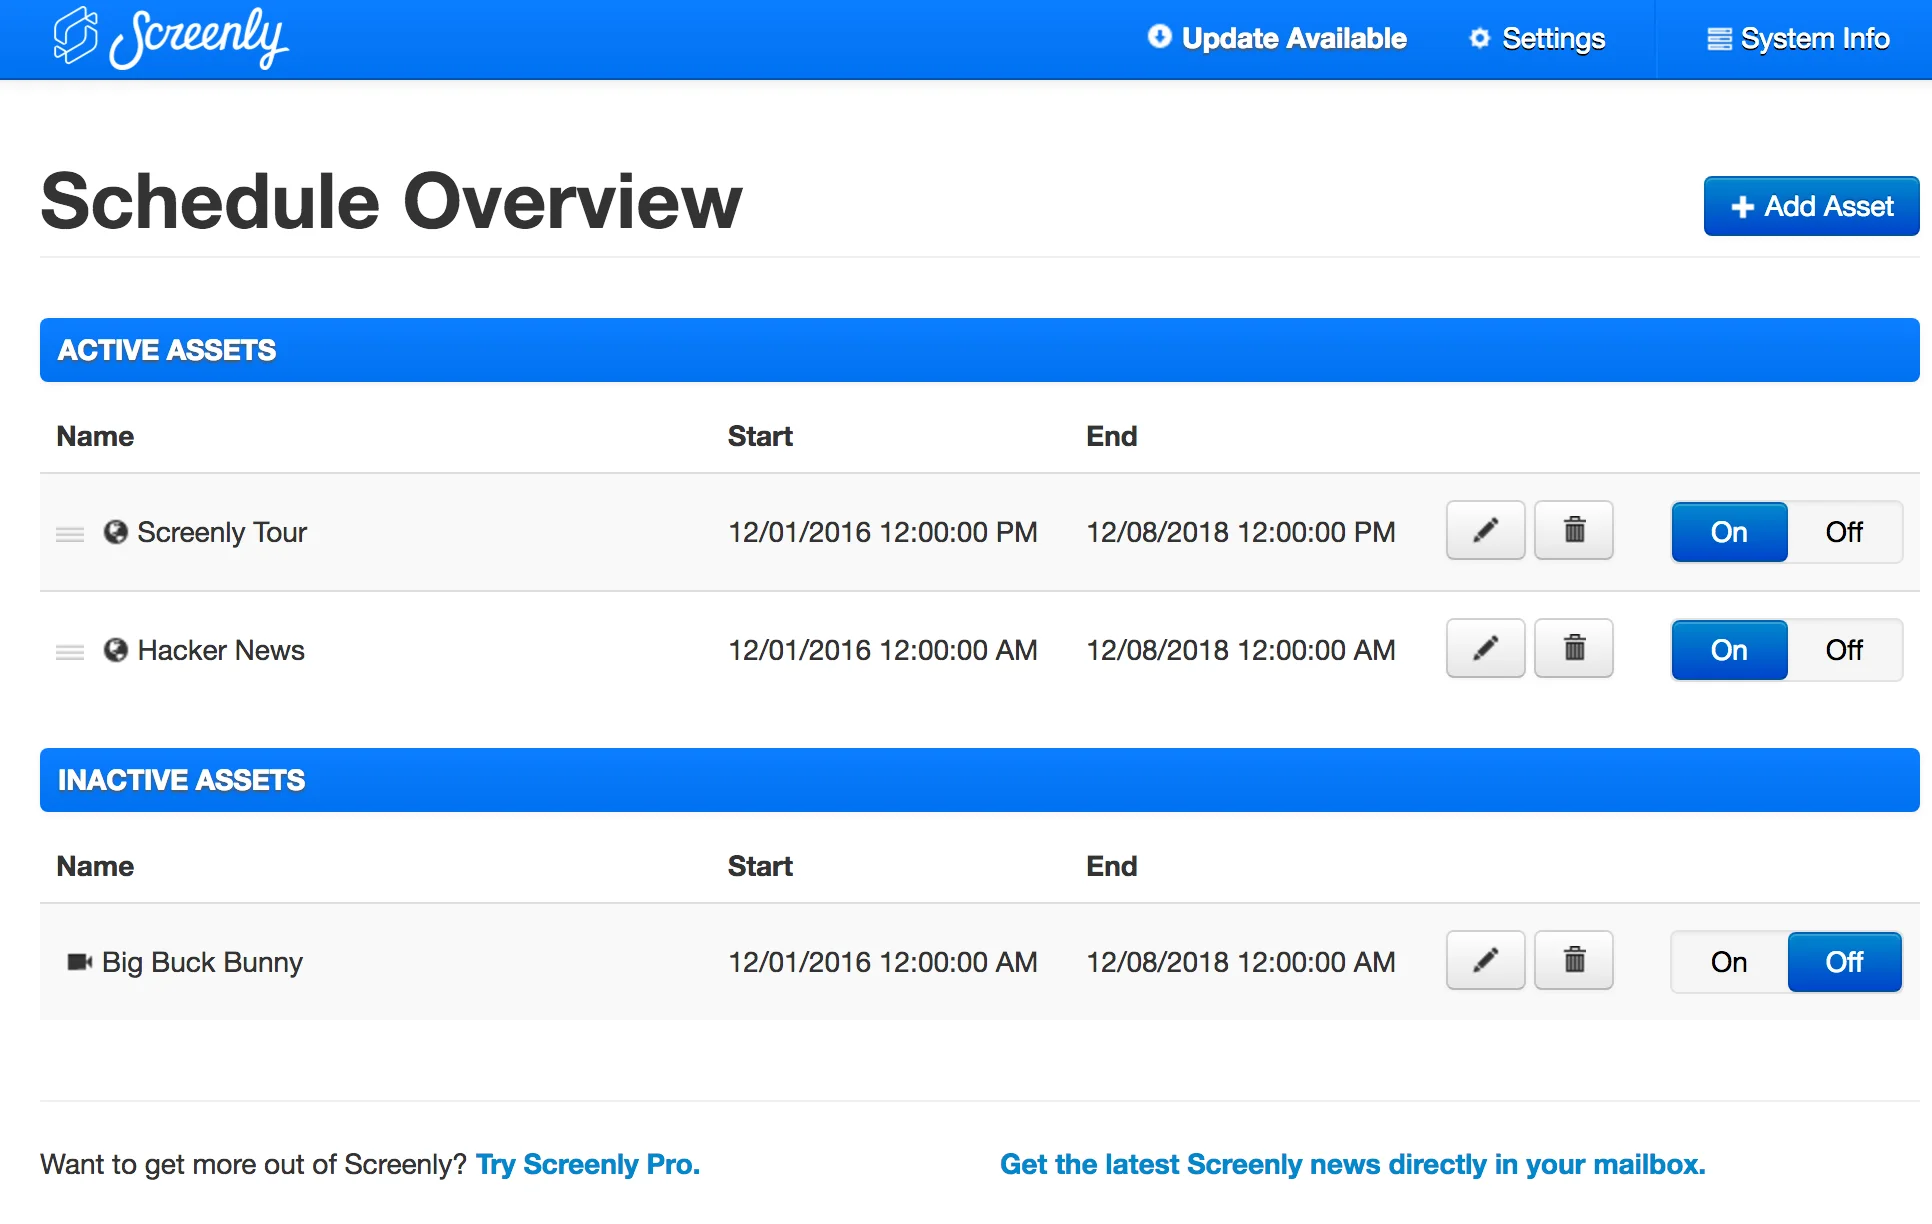
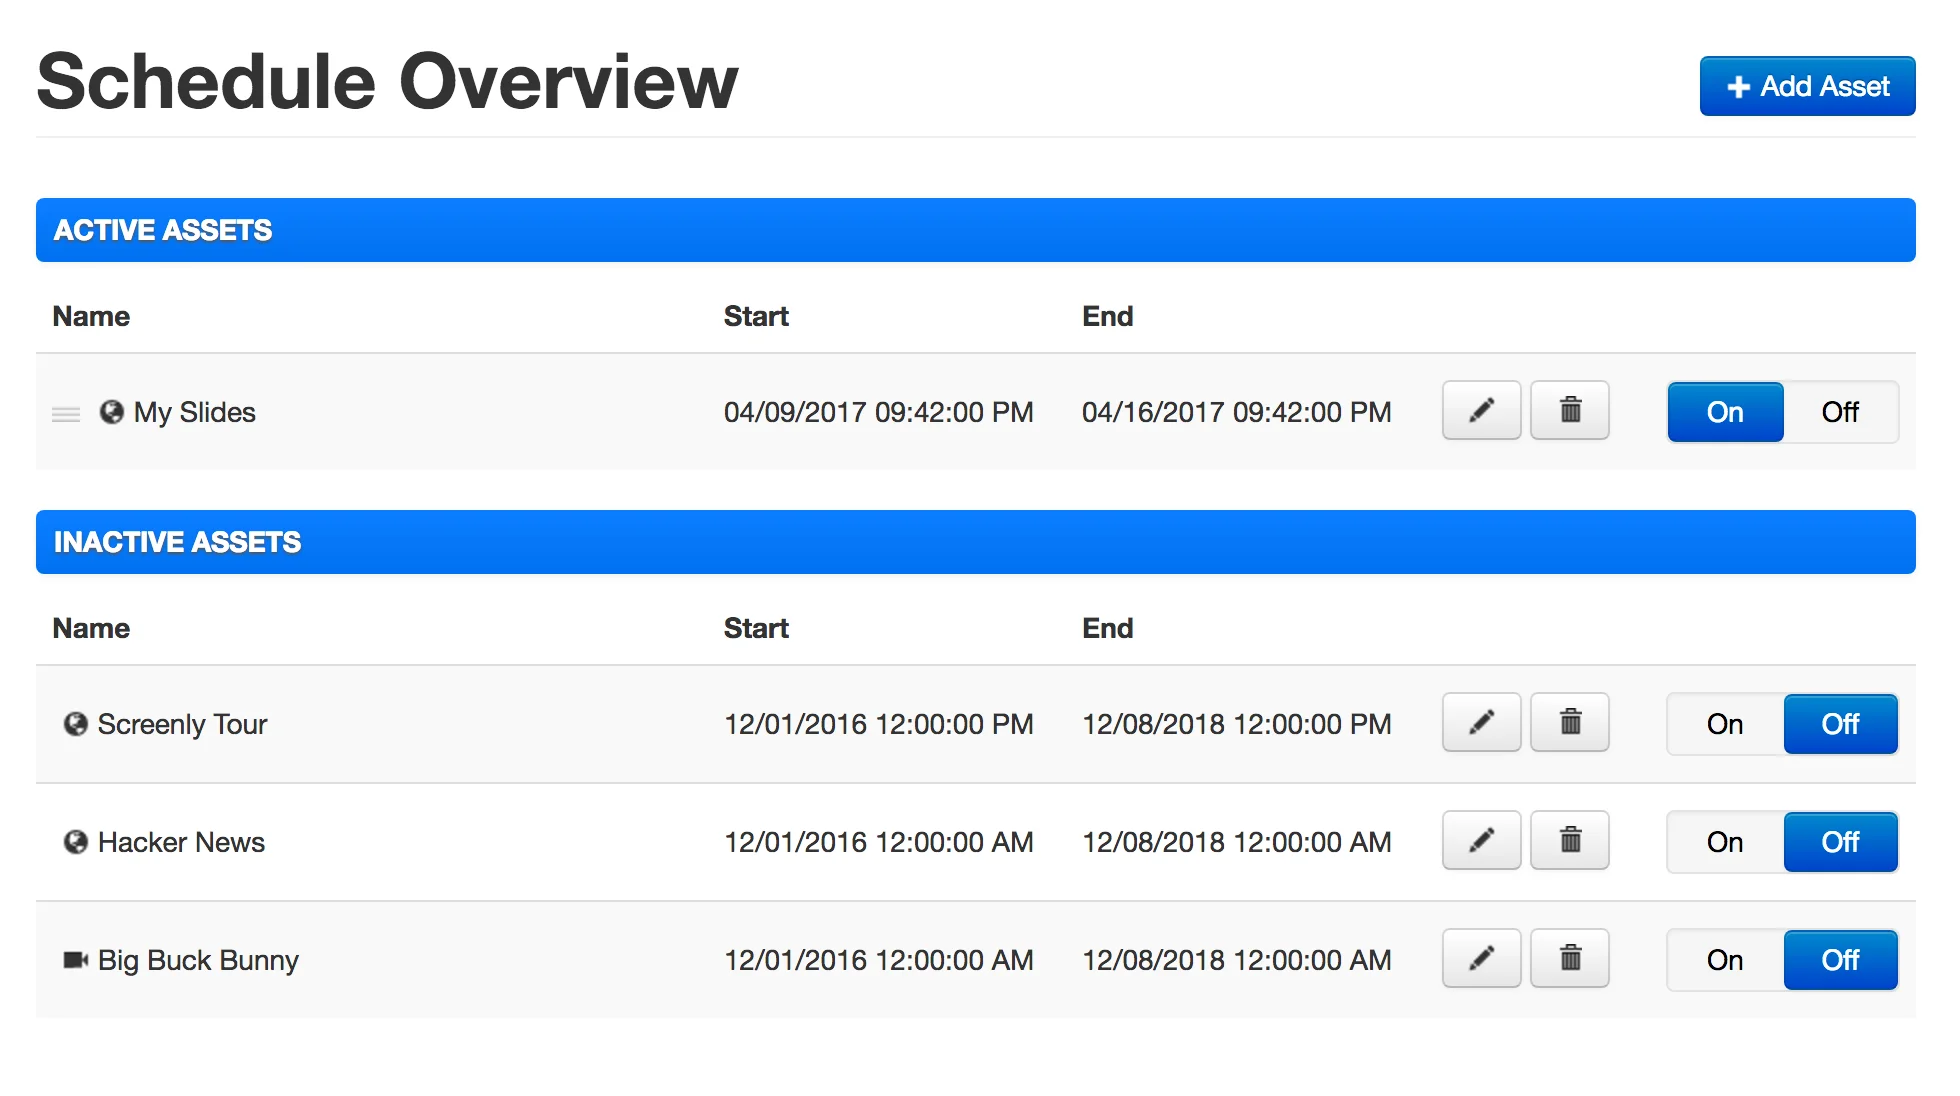
Hit Save. Your asset has been added but is not yet active. Turn off the default assets and turn on your new one so it is the only Active Asset. It should look similar to the screen below.
 Within a few seconds you should see your Google presentation on your Raspberry Pi display. Now you can share editor access to the Google Slides presentation with any colleagues that also need to update the screen and you should never have to touch the screen or the Pi again, everything can be done remotely by simply updating the presentation!
This means that you can update the presentation, add images etc using your iPad via the Google Slides app!
One other tip I would give is to check your TV for a timer. Most will have the ability to set an on and off timer that means you can set the screen to shut off overnight to save power. The Pi can remain on as it uses so little power.
If you find that your TV doesn’t pick up the Pi HDMI when switching on after a timer, then set a cron job on the Pi to reboot a few minutes after the TV comes on in the morning. This seems to trigger HDMI source switching on most TVs.
comments powered by Disqus